
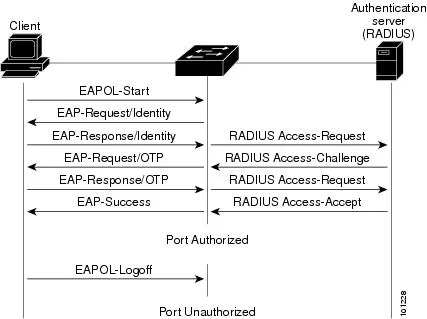
I/ 802.1X Port-based Network Access Control (PNAC) enables authentication of devices that connect to a local network. The below image illustrates the transmission of Extensible
Blog
Internal Network Attack Vector Discovery (Part II)
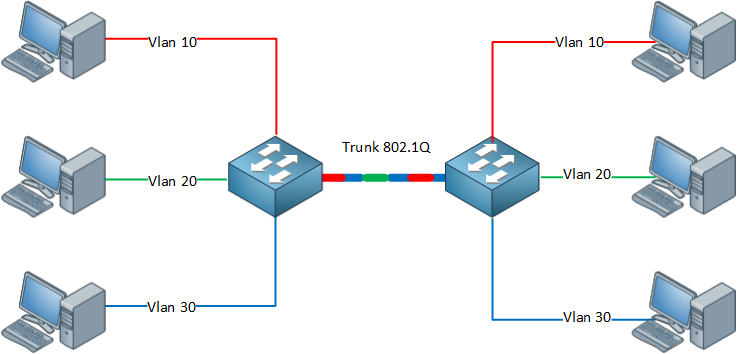
802.1Q VLAN VLANS are used within enterprises to segment networks and create individual broadcast domains. Along with reducing unnecessary broadcast of traffic, 802.1Q tagging limits
Internal Network Attack Vector Discovery (Part I)
Most of the protocols using the data link layer and local broadcast addresses are nonroutable, which means you can only evaluate them from the local
TLS Security (Final) – Assessment
In this blog, we will go over some of the methods and tools to assess the TLS security posture during an engagement. Please remember to
TLS Security (Part II)
I. Understanding TLS Vulnerabilities Hackers can exploit some TLS flaws remotely, but practical exploitation of many requires network access to compromise ciphertext and data injection.
TLS Security (Part I)
I. What is TLS? Before getting into TLS security, let’s first talk about encryption. It can generally be applied at different levels, from encryption in
SECURITY FEATURES on MacOSX (Final)
We’ll go over the remaining security features on macOSX in this blog. 9. Firewall There is a built-in standalone firewall on MacOSX but it’s not

SECURITY FEATURES on MacOSX (Part II)
In this blog, we’ll continue where we left off which covers the remaining security features on MacOS. 4. Automatic Updates New vulnerabilities for operating systems
SECURITY FEATURES on MacOSX (Part I)
In this blog, we will go over some of the security features on MacOS that implemented by Apple to protect their users. Apple is known
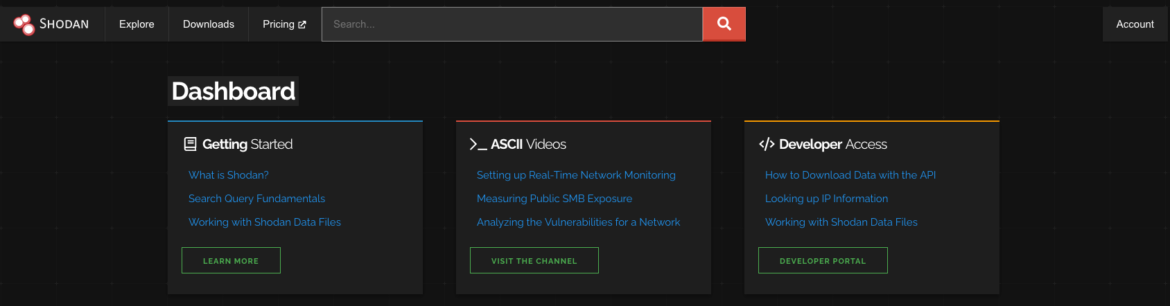
SHODAN For PENETRATION TESTER
In this blog, we will talk about how we can use one of the most commonly used search engines during the penetration testing process –
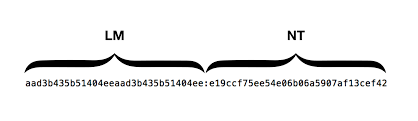
LAN MANAGER / NT LAN MANAG & NTLMv2 Hashes
Windows LM or NTLM & NTLMv2
OSINT & Passive Recon
In this blog, we’ll look at what OSINT – Open Source Intelligence is and tools we can use to gather information about the target. Reconnaissance
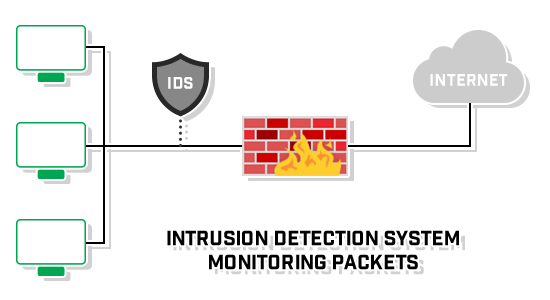
Introduction to IDS and IPS
An IDS or Intrusion Detection System monitors activity that is known or suspected to be malicious in its intent, raising alerts to a security or SOC teams to be analyzed.
IPS or Intrusion Prevention System adds another layer of defensive measure to protect resources.
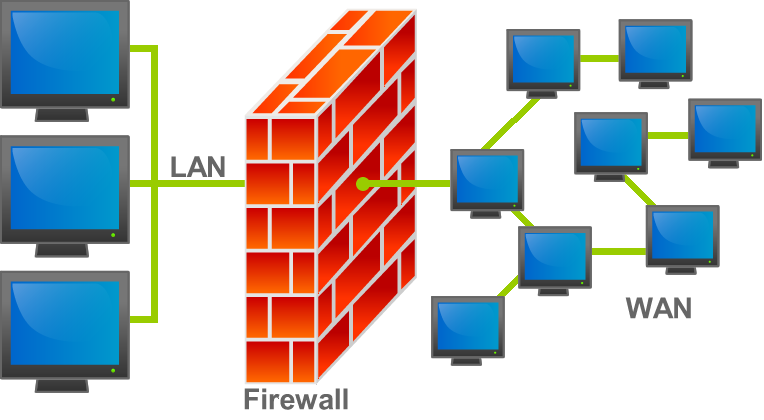
Firewalls Introduction
Firewalls can handle simple attacks pretty quickly. However, they can easily be tricked because of the nature of network traffic in which almost all network traffic is bi-directional, but stateless firewalls must decide on….

Data Security Part I
In this blog, we’ll discuss the concept of VPN, in transit encryption and what benefits VPN bring to us. I. High Level Overview of VPN
How to Secure WordPress Part IV
Following the Part III, in this blog post, we’ll go over the security checklist that can be used as a reference to enhance the security
How to Secure WordPress Part III
Let’s carry on where we left off last week (Part I and Part II). II. Secure Important Components 16. WordPress Security Keys & Salts WordPress
How to Secure WordPress Part II
Welcome to the next of the securing WordPress series. We’ll continue where we left off in part I. Secure WordPress Components (Contd) II. Secure Important
How to Secure WordPress Part I
I. Introduction When people talk about WordPress, often it would be something like: “it’s unsecured, it’s easy to get hacked,…”. But those are just misconceptions.
Common Network Attack Vectors
Today we are going to talk about a few common attack vectors, which are often taken when performing network penetration testing in enterprise and business
Firewall Evasion with Nmap
Nmap has a couple of options to bypass firewall rules and IDS/IPS such as decoys, packets fragmentation, scan delay and bad sum,…. How do they work?
Nmap Basic
I. What is Nmap? Nmap (“Network Mapper”) is a free and open source utility for network discovery and security auditing. Many systems and network administrators
Group Policy Introduction (Part II)
Understanding GPO Hierarchy and Workflow: Discover how Group Policy is processed in Windows environments. Learn the GPO hierarchy—Local, Site, Domain, and OU—and how each level
Group Policy Introduction (Part I)
A Core Tool for Secure IT ManagementDiscover the fundamentals of Group Policy in Windows—what it is, how it works, and why it’s essential for centralized
🔒 Windows Fundamentals (Part III)
Understanding Session Objects, VAD Trees, and User-Mode Memory Allocation Slug: /windows-fundamentals-session-vad-usermode-memoryMeta Description:Explore Windows Fundamentals in-depth — learn how session objects, VAD trees, and user-mode memory
Windows Fundamentals (Part II)
Windows memory management is a critical part of how the operating system maintains stability, performance, and security. In this second part of the Windows Fundamentals
🖥️ Windows Fundamentals (Part I): Understanding Memory Management in Windows
In this blog post, we’ll explore some of the most fundamental concepts behind how Windows manages memory at a low level. Learn how Windows handles